Fire control
IRON NEST ballistic calculator
Type the range to the target. You get the gun elevation for every powder charge that reaches it, and what each option costs in requisition. No sign-up, nothing stored.
Firing solution
Measured from the NEST to the target with the pencil tool, not from a spotter.
One lettered grid square is 1000 m; one sub-grid square is 100 m.
| Charges | Max range | Elevation | Requisition | Notes |
|---|
How the calculation works
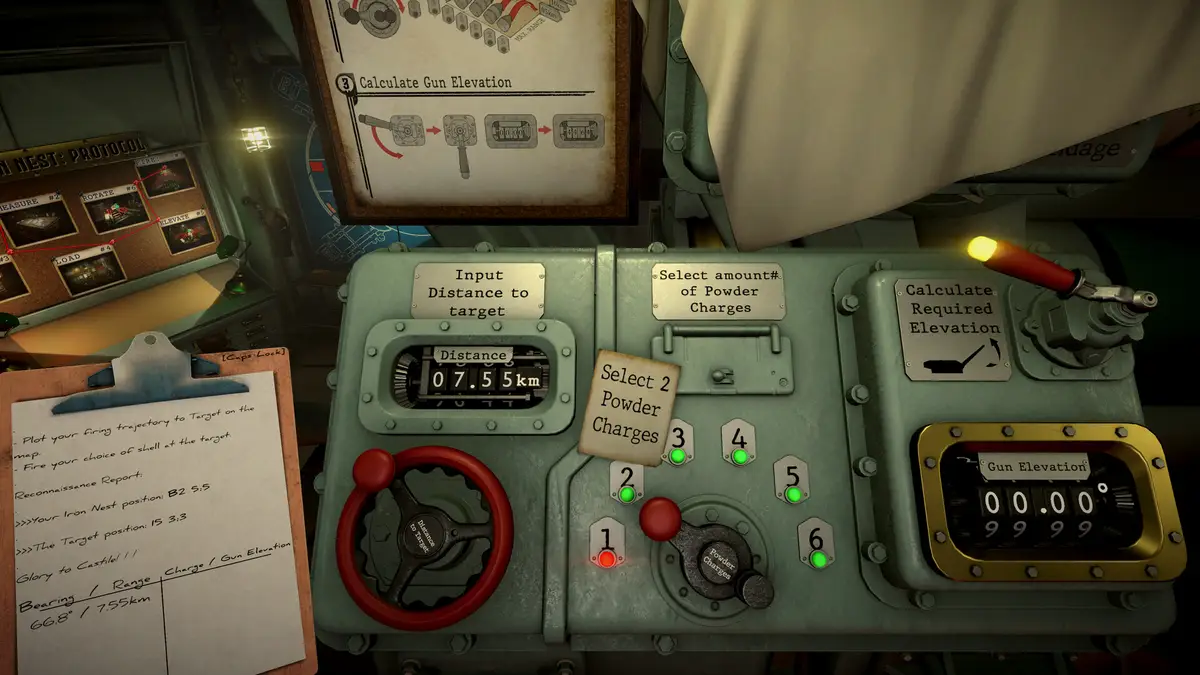
IRON NEST does not model a real ballistic arc that you have to solve. It uses a straight proportion, which is why the maths is doable in your head once you see it:
elevation = (range ÷ max range for the loaded charge) × 60°
Every powder charge you ram adds 5 km of maximum range, up to 6charges and 30 km. So the max range term is just charges × 5000, and 60° is always full range for whatever you have loaded.
Worked example. The target is 9,000 m out and you have three charges rammed. Three charges reach 15,000 m, so the elevation is (9,000 ÷ 15,000) × 60 = 36°. Load four charges instead and the same target needs (9,000 ÷ 20,000) × 60 = 27°.
The mistake that costs most people their first counter-battery run
The range you put into this calculator is the range from your gun to the target. A spotter reporting "bearing 138, range 4,200" is describing the line from the spotter to the target. Those are two different triangles. Plot the target first, then measure a fresh line from the NEST to it — that line is what the gun needs. See triangulation.
Doing it without the calculator
Mid-mission you will not want to leave the turret. Because the formula is a straight proportion, each charge count collapses to a single multiplier you can apply to the range in kilometres:
| Charges | Max range | Mental shortcut | Example |
|---|---|---|---|
| 1 | 5 km | range in km × 12 | 3 km → 36° |
| 2 | 10 km | range in km × 6 | 5 km → 30° |
| 3 | 15 km | range in km × 4 | 8 km → 32° |
| 4 | 20 km | range in km × 3 | 10 km → 30° |
| 5 | 25 km | range in km × 2.4 | 13 km → 31.2° |
| 6 | 30 km | range in km × 2 | 15 km → 30° |
Three charges is the one worth memorising: multiply the range in kilometres by 4. It covers most of the campaign, and it is exact rather than an approximation.
Which charge should you actually pick?
Any charge count at or above the minimum will reach. They are not equivalent, though:
- Fewer charges costs less requisition — 4 points each — and gives a steeper arc, which is what you want to drop rounds behind a ridge or into a gorge.
- More charges flattens the trajectory and shortens the flight time, which matters when the target is moving or when a fire mission is on a clock.
- Elevation near 60° means you are at the edge of that charge's range, so a small correction from a spotter may not be reachable without reloading. If a target sits above about 55°, consider adding a charge for the headroom.
The calculator flags both of those cases in the notes column so you can see the trade at a glance.
Next
- Triangulation — turning two spotter reports into a map position, which is where the range in this calculator comes from.
- Elevation and powder charges — the full charge table, why 60° is maximum range, and how the loading sequence works.
- Shell types — picking what goes on top of those charges.
Sources
- Community guide — An operator's guide to the basics — Player-written reference for the grid system, marking tools and charge/elevation maths.
- Official FAQ thread, Steam Community — Maintained by the developers. First-party answers on platforms, pricing, multiplayer, VR and design intent.
Last updated .