Core skill
How to triangulate in IRON NEST
Two spotters report a bearing each. Where their lines cross is the target. The step almost everyone skips is the one after that — and it is the reason the first shell lands in an empty field.
Read this before anything else
Spotter bearings, range reports, corrections, railway waypoints and vessel courses all exist to help you find a point on the map. None of them is the number you put into the turret. Once the target is plotted, you draw a new line from the IRON NEST to that point. That line — and only that line — gives the bearing and range you fire on.
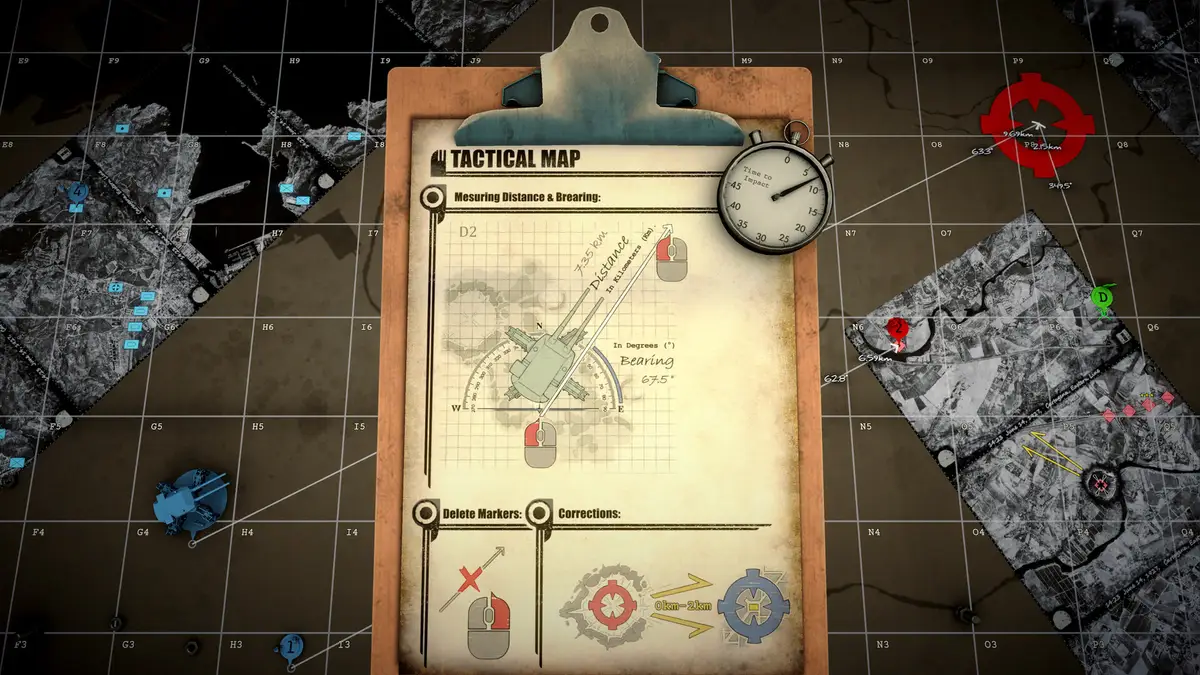
Reading the map grid
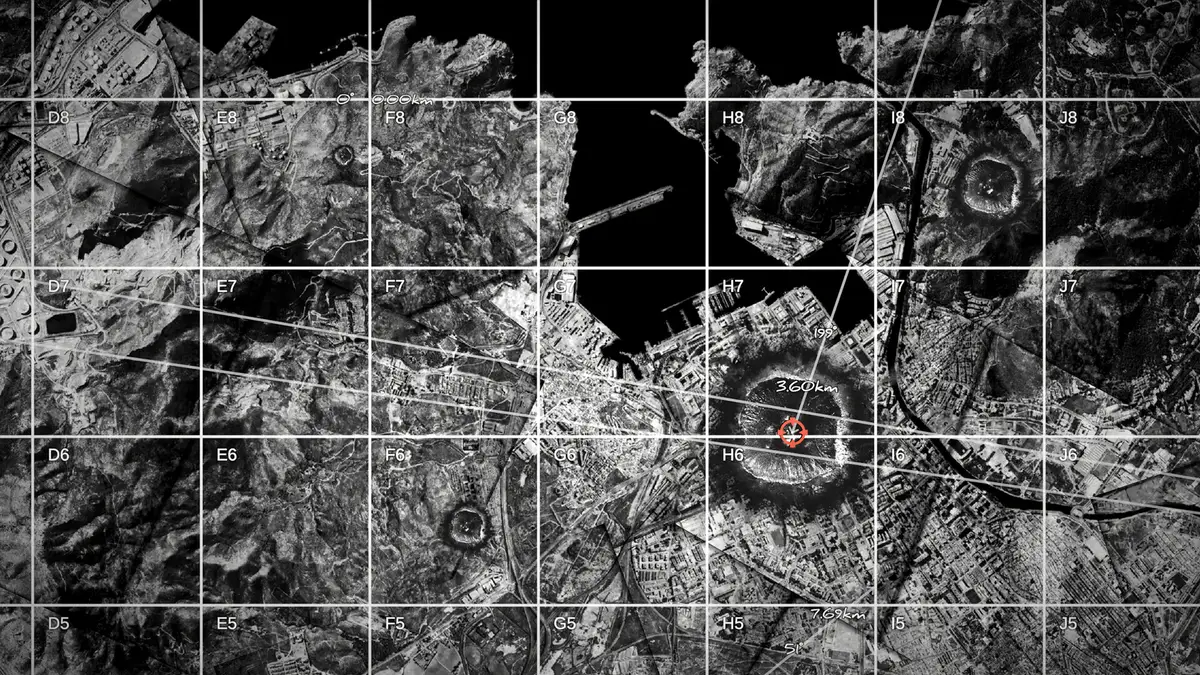
The tactical map is divided into main squares identified by a letter and a number. Each main square is 1000 × 1000 m. Every main square is then subdivided into a 10 × 10 sub-grid running from 0,0 to 9,9, so a single sub-grid square is 100 × 100 m.
A full grid reference combines both: the main square puts you within a kilometre, the sub-grid digits put you within a hundred metres. When an order gives you a reference and nothing else, that is already enough to plot a point and measure a firing line — no triangulation needed. Triangulation is for when the order gives you observations instead of a position.
The five steps
1. Find both spotters, and check the numbers
Spotters appear on the map as numbered blue markers. Match the marker number to the spotter number in the report. If a report says "bearing 138 from Alpha and 121 from spotter 3", you need Alpha's marker and marker 3 specifically. Working from the wrong marker produces a clean, confident, completely wrong intersection — and nothing about the result will look suspicious.
2. Draw the first line
Take the yellow pencil, click on spotter 1 and drag outward. As you move, the tool shows both the distance and the bearing in degrees. Swing the line around the spotter until the bearing readout matches the reported figure, then pull it out to the edge of the map. Length does not matter here — you only need it long enough to cross the second line.
Pencil choice matters for bookkeeping, not for geometry: the red pencil reports bearing and range and copies the values to your clipboard, the yellow pencil reports them without copying, and the white pencil draws lines only. Use white for construction lines you intend to ignore later.
3. Draw the second line
Repeat from the second spotter using its reported bearing. Extend it until the two cross.
4. Handle range-only reports with the compass
Sometimes a spotter gives you a distance instead of a bearing. A distance does not define a line — it defines a circle. Switch to the drafting compass (the blue tool below the pencils), set it to the reported range and draw the circle around that spotter. The target is somewhere on that circle. Intersect it with a bearing line from the other spotter, or with a second circle, and you have your point.
Two circles give two intersections
When both reports are ranges, the circles cross in two places. Pick the one that agrees with everything else you were told — which side of the river it is on, which grid square the order named, where the front line is. If nothing disambiguates them, a STAR shell over one candidate settles it for the price of one round.
5. Draw the firing line — the step people skip
Mark the intersection. Now start a fresh line from the IRON NEST's own positionto that mark. Read its bearing and range off the tool. The bearing goes to the turret; the range goes into the ballistic calculator or straight into the elevation formula.
spotter reports → plotted target → new line from the NEST → bearing + range → elevation
Finding your own position
Most missions place the NEST for you and mark it. When the NEST has repositioned, or when a mission withholds it, you invert the same procedure: take two known landmarks or friendly positions, plot the bearing from each toward you, and your position is where those back-bearings cross.
There is a faster trick High Command uses on you, and it works in reverse. If you are given a range and bearing and you fire a STAR shell on it, the flare bursts at a known point. Anyone who knows both the burst location and the range and bearing you were given can work backwards to your firing position. Useful to remember when a mission's fiction turns on who knows where you are.
Working faster
- Plot every report, even the ones you do not need yet. Reports accumulate faster than targets. A line you have already drawn costs nothing and often becomes half of a later intersection.
- Use the red pencil on the final firing line. It copies range and bearing to the clipboard, which saves a transcription — and transcription is where errors enter under time pressure.
- Sanity-check against the grid. Before firing, confirm the plotted point sits in the grid square the order actually mentioned. This catches wrong-spotter errors in two seconds.
- Keep the two elevation levers in mind. The gun has separate elevation controls, so two targets on the same bearing at different ranges can be engaged without re-laying the turret.
Next
- Ballistic calculator — feed it the range from your firing line.
- Elevation and powder charges — converting that range into a laid gun.
- Recon planes — for when there is no spotter report to triangulate from.
- Counter-Battery — the mission that first demands you do all of this at speed.
Sources
- Community guide — An operator's guide to the basics — Player-written reference for the grid system, marking tools and charge/elevation maths.
- General Discussions, Steam Community — Player reports on mission behaviour, including the counter-battery respawn rules.
Last updated .